Enter Bills
Bills received by the church are recorded in Enter Bills. You have the option to move intoPay Bills after entry. Use Credit Memos to reduce a balance without entering a payment.
Access Enter Bills
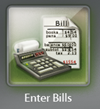
To access from the Button Bar, go to Transactions > Enter Bills
![]()
To access from the Home Screen, go to the Quick Access Button.
If you have set up Recurring Transactions to reuse in your transaction screens,
Click ![]() to apply a saved transaction.
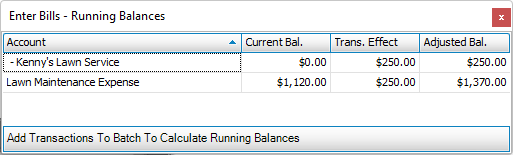
to apply a saved transaction.  will show the results of the transaction on the associated account.
 Locking Fields
Data entry fields that aren't in use can be turned off for a batch. Clicking the switch icon from green/up to red/down skips the field when using keyboard shortcuts like Enter and Tab.
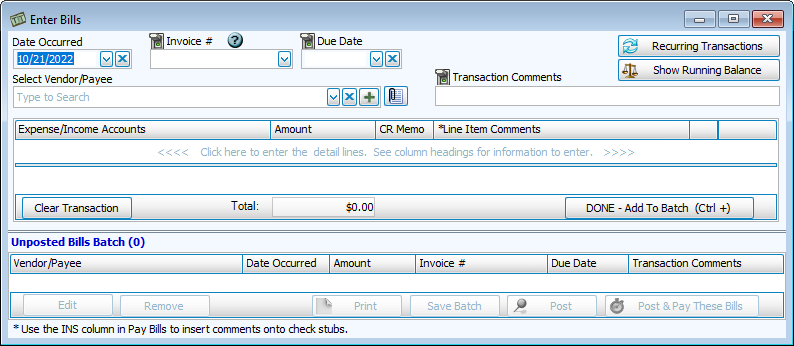
Enter a Bill
-
Enter the Date Occurred.
-
If applicable, enter an Invoice Number and Due Date.
-
Select the Vendor/Payee.
-
Comments can be noted on the Transaction or individual Line Items.
-
In the line items, choose an Expense or Income Account and Amount.
-
If the line item represents a credit being made back to the recipient of the bill, click the CR Memo box. This reduces the Total by the Amount in the line item.
-
Click Add to finish the line item. Continue entering line items, if needed. Click
 to add this bill to the Unposted Bills Batch.
Save, Post, and Pay Bills
-
Click Print to generate a Bill Batch report.

-
Click Post to record the bills in the Accounting module.
-
Click Post & Pay These Bills to open the Pay Bills screen after posting.